It is All About the Experience.

Seriously…
IT’S.   ALL.    ABOUT.   THE.   EXPERIENCE.

It’s what makes the difference between good and great. Between common and something special. If it’s done well, it can be an out-of-the-ballpark kind of thing that people talk about for months.

Experience architecture and design is very real, and it’s so worth the investment. If you’re a website developer, or a restaurant, or a retail shop, or an event planner, or if it’s just your turn to fix dinner for friends — the difference between a good meal, and a memorable evening is how you craft the experience.

4 Quick Tips for Creating the Experience

1. Visitor 411

Hmm

Who’s coming? What are they into? What would make it special for them? Does your guest like scotch? Have a nice glass of 12 year ready for when they arrive. Is your store in a warm climate? Give your customers water bottles with your logo. How about your website? Your layout should allow consumers to find and buy items easily. Think about who you are ‘serving’ and what would make them happy, then plan for it. It’s all about feeling good and leaving that mark.

2. First impressions

FirstImpression

Cliche? Yes. True? Absolutely! First impressions are lasting and super important. Consider the very first thing your visitor experiences. Light some candles at your front door, or how about the way your shop smells (incense? essential oil room spray?). Smell is a stronger sense than sight (yep, it’s true). Consider that when you’re architecting. For websites, we’re not evolved enough in smell-a-vision, but how about your homepage? Is it memorable? Welcoming? Please tell me you don’t have any flashing GIFs. Invest in a great website design with simple (super super simple) interface. And for you wedding planners… littering the reception with flowers is lovely, but what do your guests experience at the entry of the building / church / location? Consider a sign with a romantic quote or picture of the wonderful couple. It would be lovely to greet your guests in person with an infectious smile, wouldn’t it?

3. The little things

Placecard

Okay, this one is paramount. So much of a memorable experience is about those WOW moments from the little things. Real Simple offers daily inspirational quotes, Starbucks prints stories about their baked goods on their bags, for even casual dinner parties you can hand-craft placecards with each guests name. For that July wedding, have Japanese style fans for the ladies in wedding hues. Or how about a water pitcher and candle on the nightstand for your overnight guests? It’s the little things that will make people say whoa – and remember the experience you created for them.

4. Don’t forget the bathroom

GuestBathroom

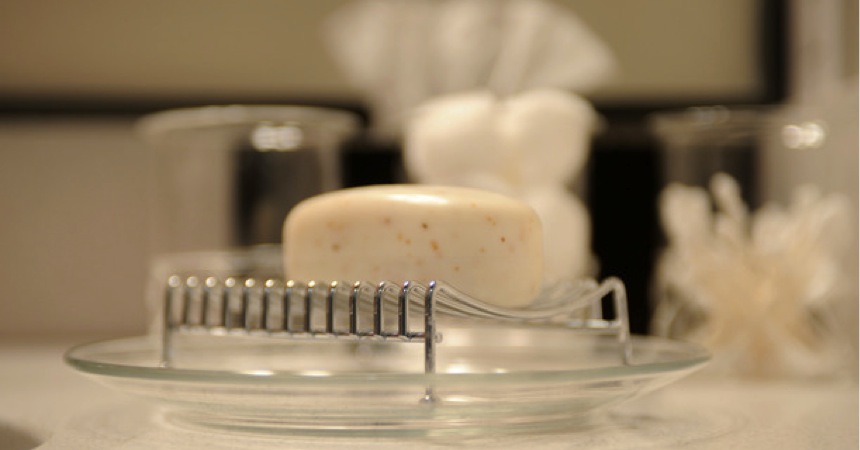
I know… you’re thinking, “Huh?!” Yes, hear me – don’t forget the bathroom. Add an extra touch in the bathroom – a lovely hand lotion, a vase of greens (they last a long time), or even a photo of your house guests. We have a friend who puts an erasable board in her bathroom and writes silly sayings on it for entertainment. Brave guests erase and add their own – it’s highly entertaining. For our wedding, I added photos of my soon-to-be-hub and I, tea lights and flowers to keep the wedding vibe. Even if you’re a retailer, add a little something special in the bathroom. Add small touches for big impact – your visitors will remember.

There are obviously more than 4 things to consider, but this will get you started and on the way to imprinting those special moments.

Let’s talk more about creating experiences soon…

Leave a comment

The peacefulness of early mornings.

Is it strange to yearn for a quiet time even after a night of sleep? Just me, a warm cup, something to read and silence? Maybe it’s the lure of a calm start to the day. Maybe it’s the luxury of starting slow. Maybe it’s the guilty pleasure of alone time with a cup of tea. (Yes, Yes and Yes.) Whatever the reason, it’s worth cherishing.

MorningRest

Leave a comment

Handmade_BB15We Need More Analog in this Digital World.
We live in a digital world. Everything is now computerized – for efficiency, speed and the proliferation of technology into all corners of the world. We stare at screens all day and communicate primarily through keyboards. The things we buy are machine-made, programmed and produced in mass quantities. In all this efficiency, we’ve lost the beauty and ease of analog. What we really need is an influx of analog into this digital being. An influx of simplicity and hand-crafted materials made by real people and artists. Less dials and buttons and computerized voices. More warmth, handmade and face-to-face. Let’s get back to human.

Leave a comment

Face Mugs with a Treat Cubbie Surprise.
I love it when clever, funny and good design find each other and bust out. Saw these “colorful face mugs” in the latest uncommongoods.com catalog and giggled out loud. Straight into the cart with you!

FaceMugs

Leave a comment

DIY Dinosaur Planters.
I saw dinosaur planters on uncommongoods.com and fell in love. But $45 each? Ooomff. After a bit of poking around, found a simple DIY from High Walls for making your own! I’m smitten and feeling crafty… RAWR!

What You’ll Need:

Rubber dinosaur toys / figures (as many as you want to make)
Box Cutter / Exacto Knife
Large Sewing Needle
Spray paint in your choice of colour/s
Small plants (succulents or air plants)
Newspaper / drop sheet for painting

DIY: Dinosaur Planters by www.highwallsblog.com

How To Make:

1. Carefully cut a hole in the back of each figure to pot  the plant in. Decide which plant will go in which figure so that you can cut a smaller/bigger opening if need be. Make sure your figures are rubber as this can be fiddly depending on the size and shape. Trying to cut into hard plastic is only going to increase your chances of injury.

2. Next using a large sewing needle poke some drainage holes into the underside of each figure. Again, be careful! I found that one of my figures was too thick to get the needle through, so I chose to use my knife again to cut some small holes/slits. Decide what is going to be better for you. Also take note of the shape of the figure, if it slopes downward towards the tail you may want to put the holes lower so that you don’t have water pooling inside.

3. Give each figure a wash to remove any excess dust and dirt and then let dry completely.
DIY: Dinosaur Planters by www.highwallsblog.com

4. Place figures on the newspaper/drop sheet with enough distance apart to spray all sides of each dinosaur.

5. Give the spray paint a good shake and apply thin even coats to each figure. Be patient with this stage. Leave each coat so it’s at least touch dry in between painting. Your figures will have lots of small, awkward parts to reach so you will need to do many coats from different angles before you have even coverage.I found it easiest to do the top sides then once they had dried completely, I turned them over and did the under sides. It probably took around 3 repeats of this process to get my figures to the depth of colour I wanted all over.
DIY: Dinosaur Planters by www.highwallsblog.com

6. Let dry overnight before adding a second colour.

7. If you are adding a second colour, tape off  the areas you want to stay the first colour. I want to make mine look dip-dyed in parts, and only the spines of my stegosaurus, so I taped off all other areas. Again it is important that your first colour is completely dry at this stage or else you will rip off the paint!

8. Using the same method as before add thin coats of the second colour to the un-taped areas. I found that I only needed 1 or 2 coats with this gold, but you may find you will need to do a few depending on your colour choices.

9. Once completely dry you can remove the tape. If you have a sealer, you can do a layer now, I couldn’t find any but so far it hasn’t mattered too much. The paint hasn’t chipped or discolored.

DIY: Dinosaur Planters by www.highwallsblog.com

10. Now you can pot your plants. Again, this may be a little fiddly due to the size of the planters, but try to ensure you fill each one firmly with soil other wise your plants are going to sink once you water them a couple of times.

11. Clean off any excess soil and water your plants and you’re done! Place your new dino planters somewhere sunny and remember to water them according to what kind of plant you have chosen. I only need to do mine once a week. I pop them on my kitchen sink or a tray when watering to catch any water that drains out through the holes.
Hope you like your awesome new planters! Much more interesting than boring pots! 🙂
DIY: Dinosaur Planters by www.highwallsblog.com
Leave a comment

If the World Seems Too Big, Get Small.
When things feel overwhelming, too much, more than a mouthful – get small. Take it one small piece at a time. Take the big task / assignment / list of chores and chunk it up. By taking one little part at a time, things are much more …. reasonable — achievable — doable! So stand back, break off a piece, and get small like Alice and her crazy mushrooms.

Mushrooms_BB14

Leave a comment